Add Property Managers (PM Accounts)
Easily add an unlimited number of Managers in Rentec Direct PM to help organize your team and control access using role-based permissions.
Managers can be assigned specific responsibilities, such as Property Manager, Maintenance Manager, Marketing Manager, or office staff who handle tasks like receiving and applying payments. Each manager can also be assigned to specific properties and given access based on their role.
Important System Note:
The user listed in Settings > Your Contact Information is the Account Administrator. This user has full system access and should not be added as a manager or sub-user.
Add a Manager
Although only a few fields are required, completing all available information is recommended for accurate record-keeping, reporting, and reconciliation.
In your Rentec Direct account:
- Click Settings
-
Under Account, click on Managers & Users

- Click + Add a Manager
- Enter the manager's details
- Company information will default from your account and can be edited if needed
- Choose whether the manager will have login access:
- Leave unchecked if they do not need to log in
- Check Enable User Account to create login access
- If enabling login:
- Enter a Username (email address recommended)
- Create a Password
-
Select the manager's Permissions level
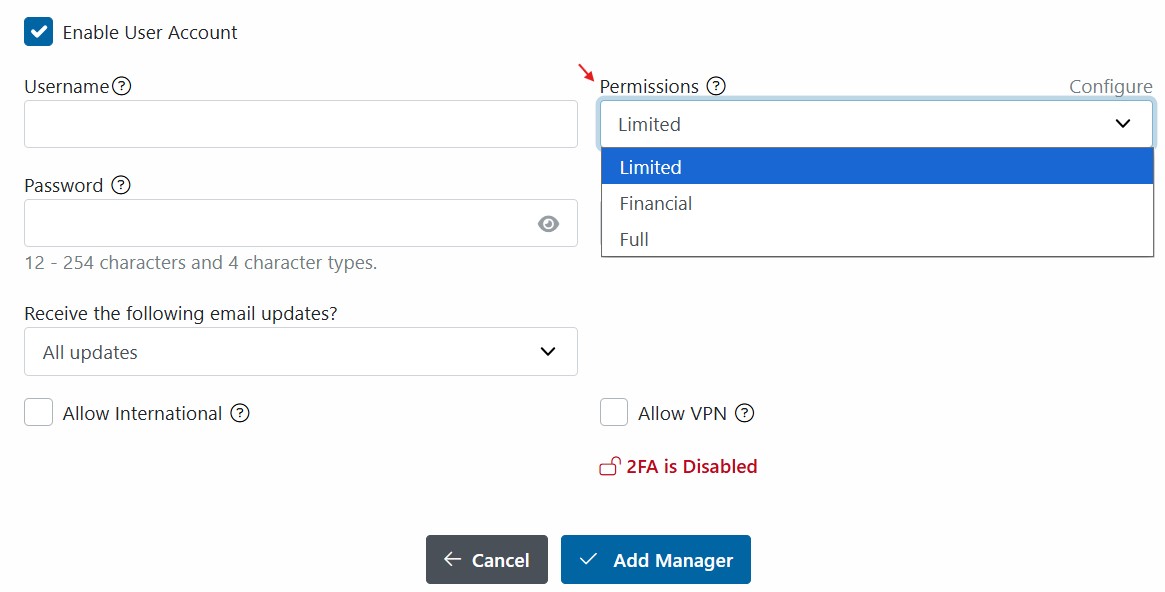
- Click Add Manager


Note: Each user should have their own unique username and password. Users can update their credentials after logging in.
Before You Begin
- Decide what access the manager needs
- Decide if they will be paid management fees
Security Note:
By default, new users cannot permanently delete properties or tenants. This access must be explicitly enabled through Custom Permissions
Learn more: Customize Manager and User Permissions
Help Managers Get Started Quickly
To make access easier, you want to:
- Suggest downloading the Rentec Direct Mobile App.
- Suggest they create a desktop shortcut to the login page
These options help users access the system quickly and consistently.
Login and Security requirements
- Each manager must have a unique username and password
- All users of accounts with online payments enabled must set up 2FA or Passkey at first login
- We strongly recommend that all users enable 2FA
Learn more: Two-Factor Authentication
Management Fees
If you will be paying or tracking management fees through the software for the manager:
- Create a management fee expense category
- Add the manager as a Payee (if paying via ACH)
- Assign the manager to the correct property or properties as the Property Manager
Learn more: Pay Out Separate Management Fees

Frequently Asked Questions (FAQ)
Q) How can I confirm a manager has the correct access?
Log in using the manager's credentials to view exactly what they can access and make changes as needed.
Q) What is the fastest way to set permissions?
Start with Full access, then remove any permissions the manager does not need. This is the quickest way to customize access.
Q) How do I know if permissions are customized?
If any changes are made to a preset permission level, the user will display as Custom in the Managers & Users list.
Q) What happens if a manager is switched from Custom to a preset level?
The system resets permissions to the selected preset level, and any previous custom changes will need to be reapplied.