How to Post an Expense to a Property Ledger
Expenses can easily be posted directly to the property ledger and will automatically reflect on the linked bank account as well.
Tip: Scan a receipt to enter expenses automatically. Learn more here: AI receipt scanner.

In your Rentec Direct account:
-
Click on Properties, then click on Post Expense on the Property Card
(or Right-click on the Property and select Post Expense from the menu)
-
Begin entering the Payee to select from your Vendors & Payee list.
(If they are not on the list, type their name in the Payee field to automatically add them and later edit their information. If they are to be paid via ACH, their email, account information, and mailing address are required)
- Enter the transaction details. Be sure to indicate the correct Category for accurate bookkeeping and reporting.
- Charge Tenant: If the tenant is responsible for the expense, use the dropdown to select the tenant to automatically add the charge to the tenant ledger.
- Click the Attach Files link to attach documents or photos (PM accounts will also offer the option to share with the property owner)
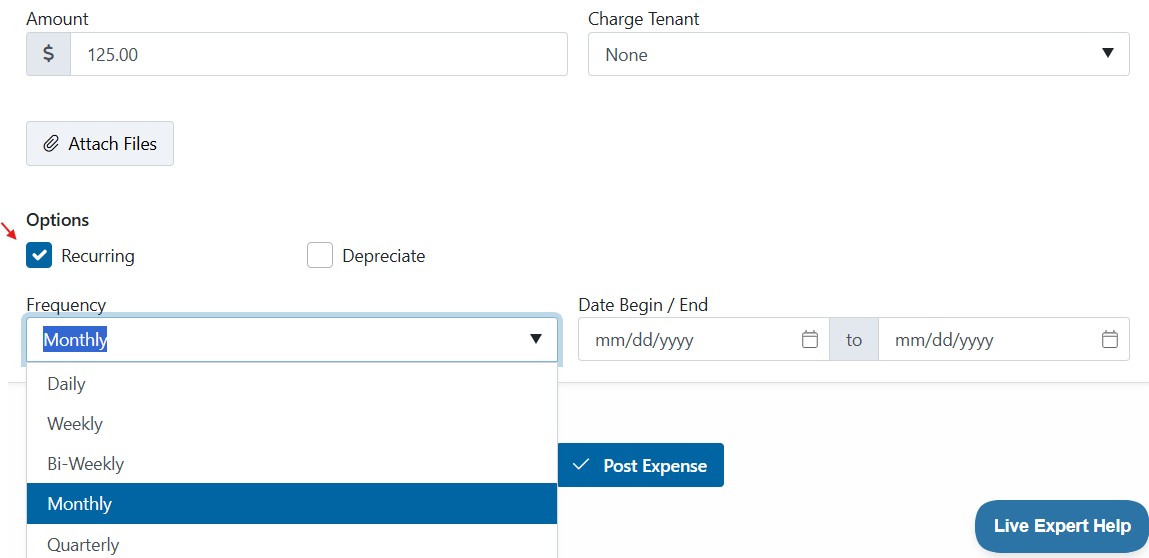
- Recurring - If this is a recurring expense, check the Recurring box and enter the details.
- Depreciate - If this expense is depreciable, check the Depreciate box and enter the details.
- Click on Post Expense
Tips
Unsure of which ledger to post expenses to?
Property Ledger
Expenses that are posted to a property ledger will automatically be reflected on the linked bank ledger
- Posting an expense directly to a property ledger
- Expenses posted from a Work Order
Bank Ledger
Expenses that are posted to a bank ledger can also be reflected on a property you select
The following types of expenses should be posted to the Bank Ledger:
- Batch Transactions: For expenses that apply to multiple properties (e.g., a vendor payment for landscaping at multiple locations).
- Split Transactions: Transactions where different portions may apply to different categories and/or properties
- Expenses automatically entered by scanning a receipt. Click here to learn more about the AI receipt scanner.