Scheduling Online Payment Transactions For Tenants
Most clients encourage tenants to make payments directly through the Tenant Portal. However, if needed, you can also quickly and easily schedule future payments on a tenant's behalf.
Pro Tip: It is highly recommended to obtain written authorization that clarifies the accounts to be used, the fees, and a tenant's signature, either in a rental agreement or as an addendum.
Need a form? Download and customize one of these samples:
Watch: Scheduling Online Payments for Tenants for simple, step-by-step instructions
Schedule A Payment For Your Tenant | Rentec Direct Training Series from Rentec Direct on Vimeo.
Scheduling Online Payment Transactions for Tenants
Once you've received the authorization form back from your tenant, scheduling one-time or recurring payments for a tenant is simple.

In your Rentec Direct account:
- Click on Tenants
-
Right-click on the tenant and select Online Payments
- Under Online Payments, click on Payment Accounts to add the tenant's payment information from the tenant authorization form and voided check for ACH transactions.
- Click Add Account to save, then page back to continue scheduling transactions.
-
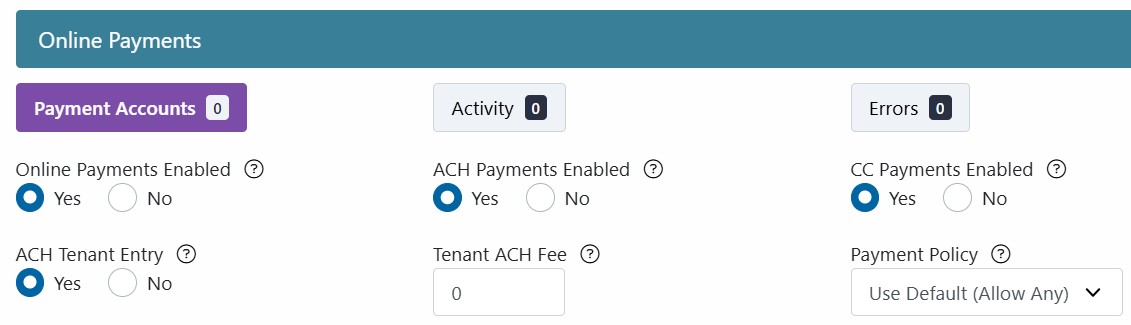
Verify all settings are set to your specifications. When completing the settings, hover over the "?" for more details.
System Tip: Either ACH Payments Enabled or CC Payments enabled must be set to yes for a payment to process.
- Check Recurring Transactions to schedule weekly, bi-weekly, or monthly payments or One-Time Transaction for a single transaction to occur. Reference the Transaction Timing section below when choosing the Recurring Start Date, Frequency, and Interval Day.
- Enter the scheduled payment details and click on Save Changes to schedule the transaction

Payment Schedule and Transaction Timing
Payments are submitted for processing three times daily:
- 3:00 AM PST
- 4:00 PM PST
- 9:00 PM PST
Payments are then batched by CSG Forte's system once (1) per day at 4:30 PM PST.
Processing Time: Funds typically transfer within 1-3 business days.
Recurring Transactions Schedule
Recurring Transactions are designed to process payments on a future date you choose automatically. Example:
If you want a tenant's payment to process on the 1st of each month, set:
- Frequency: Monthly
- Interval Day: 1
Payments will then begin processing on the 1st of the next month.
Important Timing Note: If you schedule a payment for the same day, it must be submitted before 9:00 PM PST. Any payment entered after this cutoff will be processed on the next scheduled date.
Frequency Options
Monthly - Payments will process on the same Interval day of each month as indicated. If a value is set to a value greater than the number of days in a month, the transaction will run on the last day of the month. (for example, if set to run on the 31st, February payment will process on the 28th)
Bi-Weekly - Processes a payment every other week on the specified Interval Day of the week, provided 14 days have passed since the last successful payment.
Weekly - Process a payment on the specified Interval Day of each week.

One-Time Payments Schedule
One-time payments can be scheduled for the same day, as long as they are entered before 9 pm PST.
- Payments entered after 9 pm PST will display an error message
- The payment will need to be submitted the following day.
Tenant Payment Access
If Online Payment Enabled and ACH Tenant Entry are set to YES for that tenant, they can manage and edit their payment schedules in their enabled Tenant Portal.
Tip: Easily track your scheduled and processed online payments with Online Payment Reports