Printing Checks
Rentec Direct makes it easy to print checks directly from your account and supports the most common check formats.
This article covers:
- Create a Check to print
- Previewing and printing checks
- Configuring check printing settings
- Frequently asked questions
Tips Before You Get Started
- Printing checks requires a laser printer
- You can print from a mobile device, but a tablet or desktop is much easier and recommended
- To display the memo, category, or check number on Account Ledger reports, update the advanced settings under Program Default Settings | Preferences
- All check and reference fields support up to 45 characters
Create a Check to print
Expenses entered throughout the software can be printed as checks. The steps below show how to post an expense to a Property Ledger and mark it as a Print Check (for printing).
In your Rentec Direct account:
- Click Properties
- Right-click the property and select Post Expense
- Click the Payment Type dropdown
- Choose Print Check
- Select a Payee from the list or begin typing their name
- Enter the payment details
- Attach files as needed
- Post Expense
System Tips:
- If a Payee is not listed, typing their name will add them to your vendor list
- Learn more about adding vendors and payees in Add Vendors and Payees
Optional Settings When Posting an Expense
Property Ledger
- Charge the expense to a tenant if applicable
- Create recurring transactions
- Depreciate improvements
- Split Transactions
Preview and Print Checks
After you've posted an expense using the Print Check option, you can preview and print the check.
In your Rentec Direct account:
- Click Banking
-
Click the check icon next to the bank account

-
Select the check (s) you want to print, or select the all box at the top
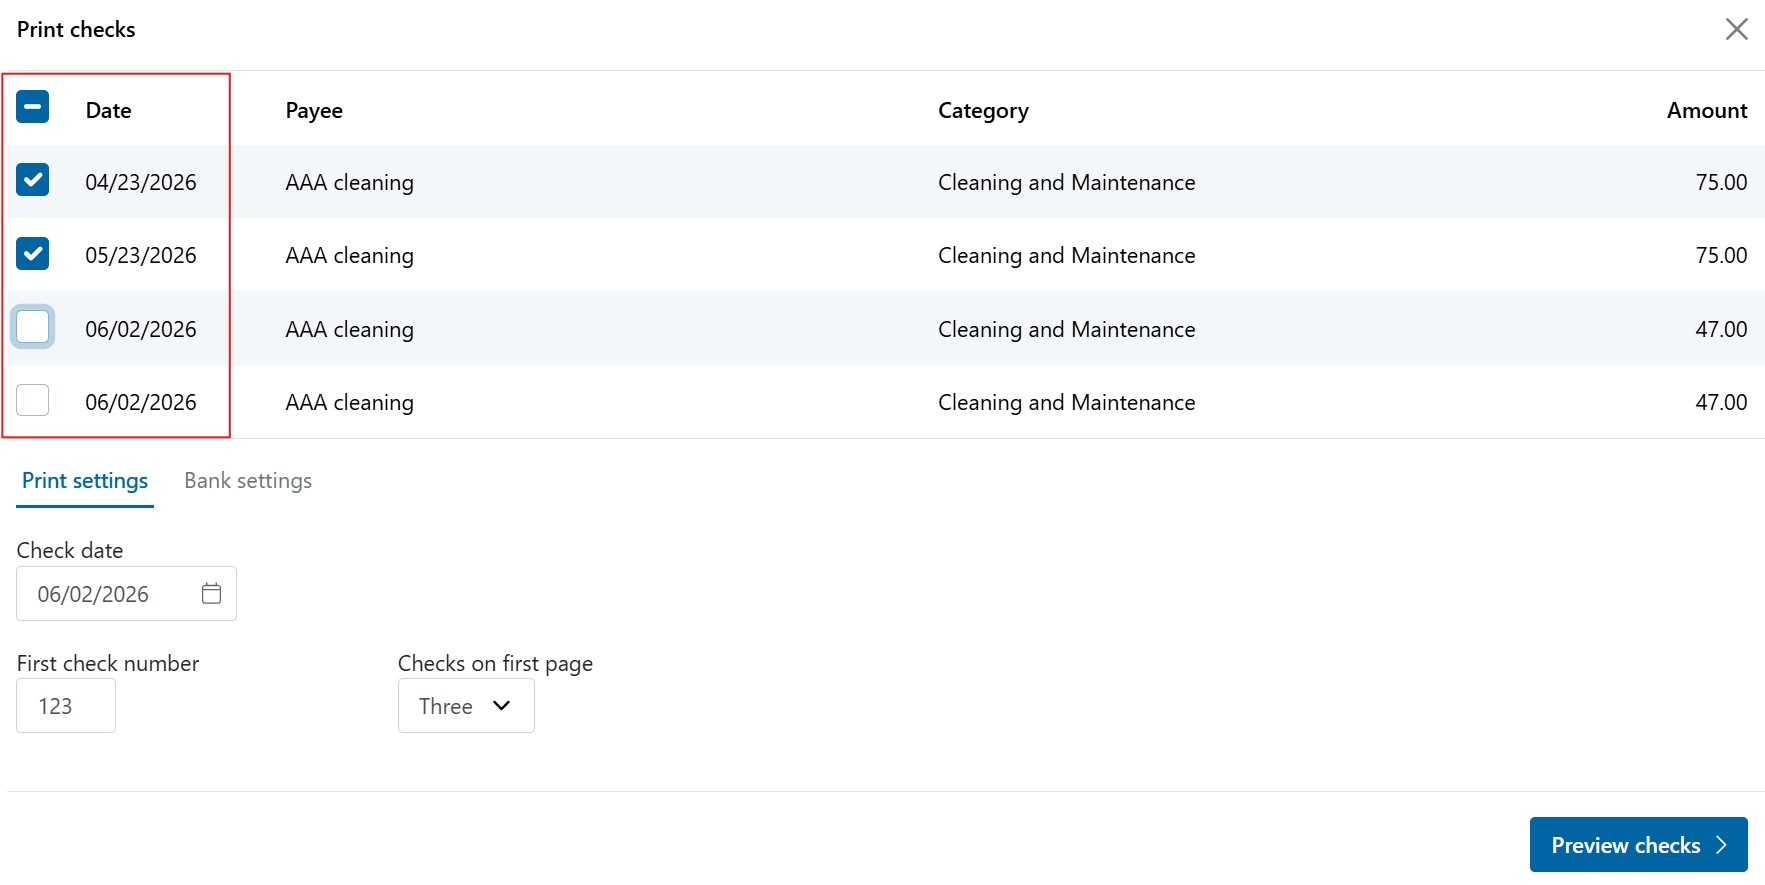
- Click Print Settings
- Enter the Check date
- Enter the First Check Number
- Select how many checks print on the first page
-
Click Bank Settings
(This only needs to be done once per bank)
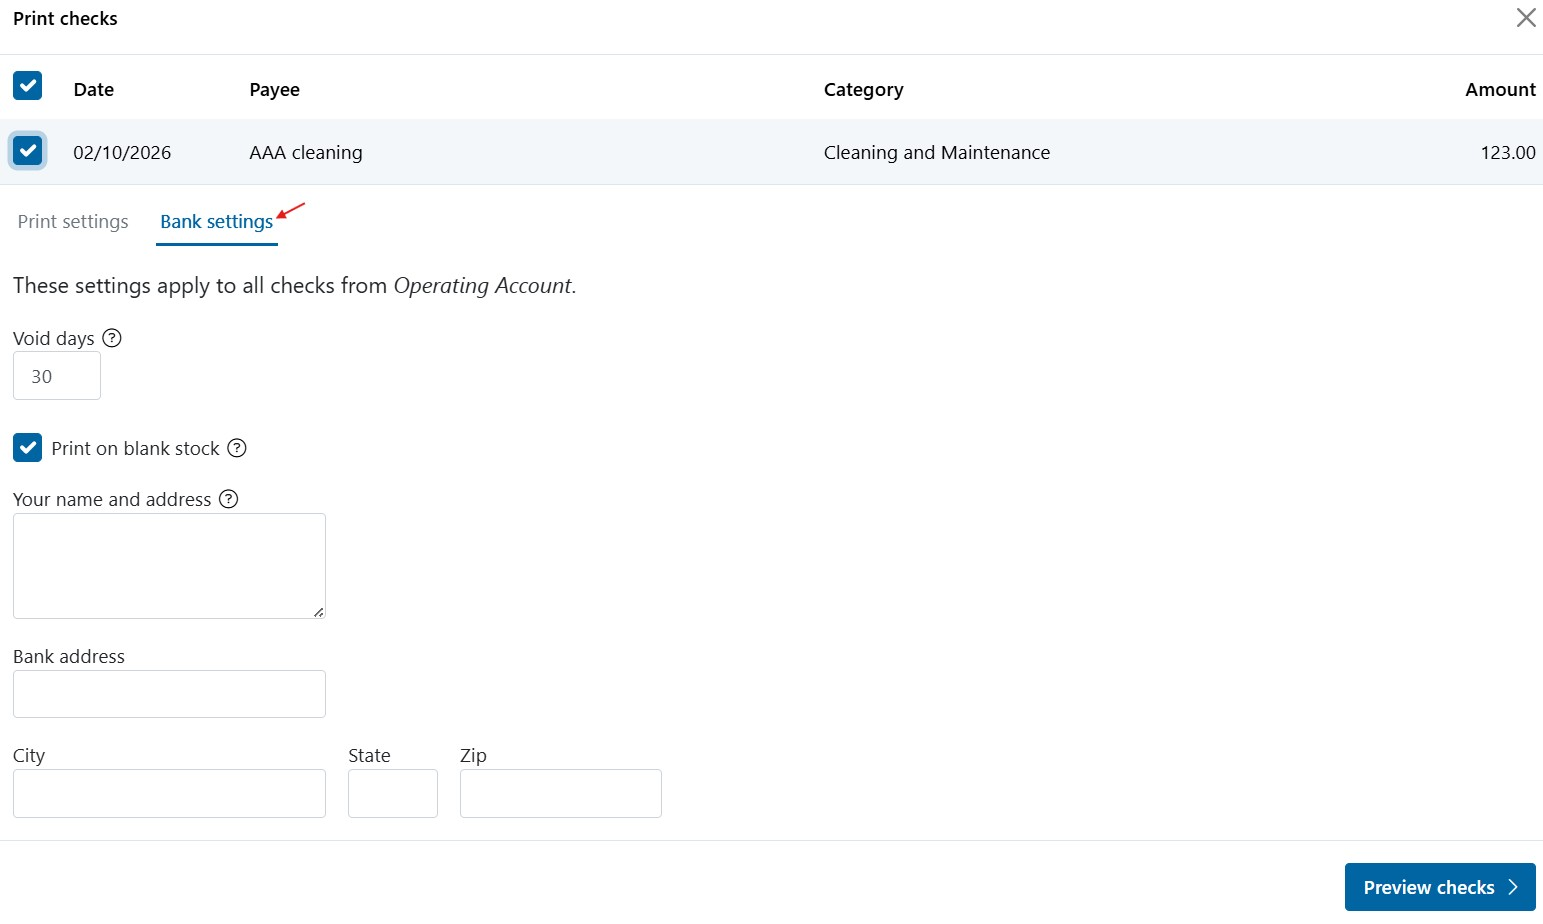


If using blank check stock:
- Enable Print on blank stock
- Enter your name and address (usually your company information)
- Enter the bank name and full address
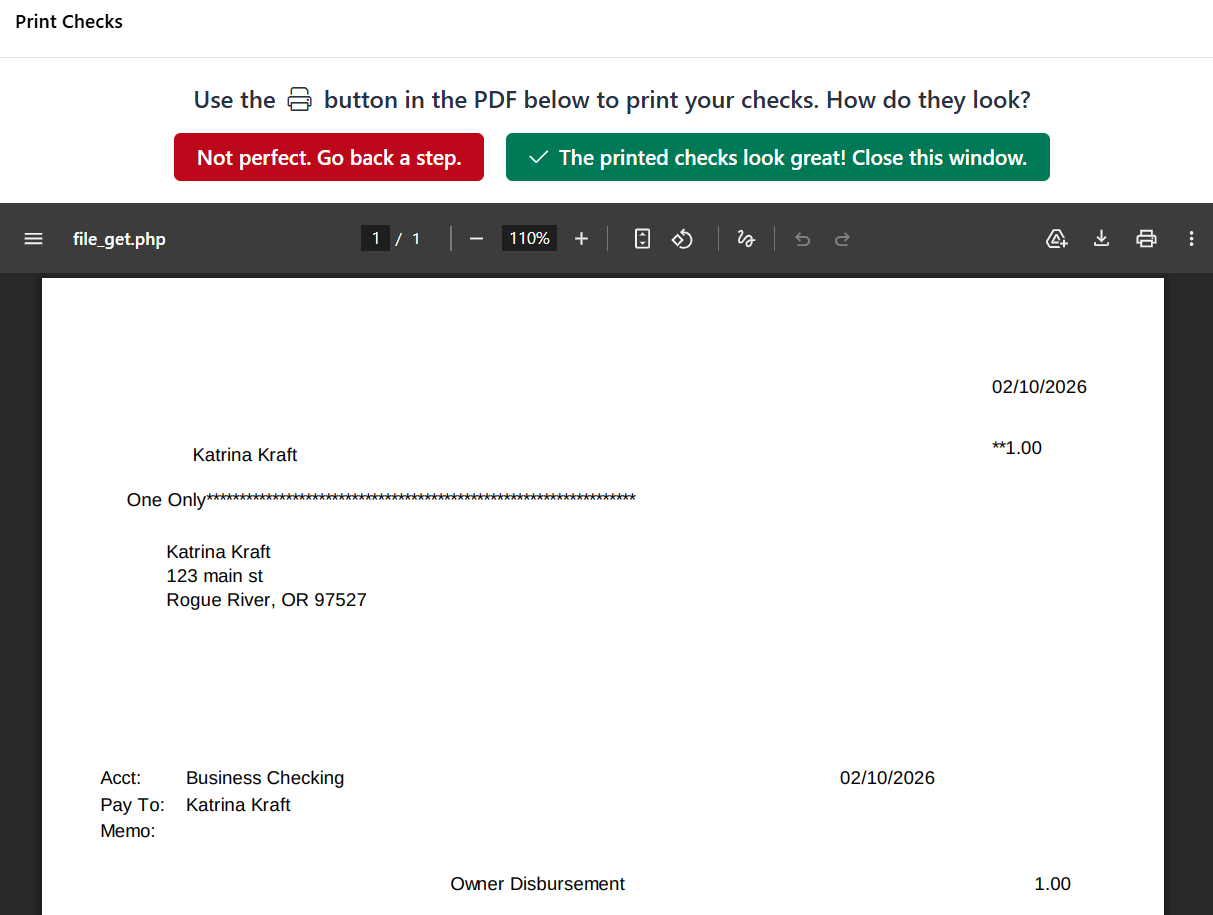
- Click Preview Checks
- Click the printer icon to print
-
Select The printed checks look great! to finish
or select Not Perfect, go back a step to make adjustments
Repeat as needed until the check layout is correct.
Additional Printing Recommendations
-
Printers may collate pages differently
You may need to enable Reverse Pages in your printer settings
- Always print test checks on blank paper before using real check stock
-
Checks are generated as PDFs to ensure accurate placement
If nothing appears, install Adobe Reader
- In the print dialog, select Actual Size to prevent scaling issues
Configure or Adjust Check Printing Alignment
Before printing checks, confirm your printing preferences match your check layout.
In your Rentec Direct account:
- Click Settings
- Under Financial, click Accounting Defaults
-
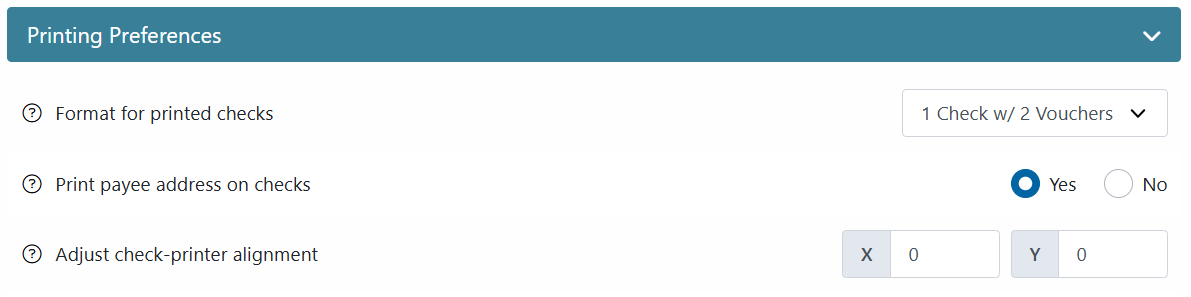
In Printing Preferences:
* Select the check format
* Choose whether to print the payee address
* Use the Check Printer Alignment tool if needed
- Save Changes
Tip: Hover over the ? icons for additional details
Frequently Asked Questions
What are common uses for printing checks?
- Print a one-time expense, such as returning a tenant security deposit
- Printing a single check for multiple vendor transactions using Batch Expense transaction tool
- Printing multiple checks at once
- Creating recurring checks for fixed monthly expenses like utilities or landscaping
What is the difference between Check and Print Check?
- Check records a check written outside the software
- Print Check is used when printing a check directly from the software